How to generate an Android SBOM per build with Github Actions
If you’d like to generate an Android SBOM every time you build your app, you can combine previous techniques discussed on this blog to achieve this with GitHub Actions + NowSecure. If you’re not a NowSecure customer, first sign up for 10 free SBOMs so you can follow along in the tutorial.
To brush up on the previous techniques, check out my blog+video on how to generate an Android SBOM in CycloneDX format. This article will walk you though setting up your environment, building a React Native Android app, generating a list of dependencies with gradle and and finally how to generate a CycloneDX SBOM with binary analysis leveraging NowSecure Platform.
We can then leverage the above techniques to automatically generate an Android SBOM each time you update your mobile app.
1. Code setup
For this demo, we’ll change from a React Native Android app in previous tutorials to a more traditional Java + Kotlin app. K-9 Mail is a popular open source Android email app that’s been around since at least 2008 (initial commits) and in active development. You can find it on both F-Droid as well as the Play Store.
Fork and clone repo
While you could perform all changed needed directly in the GitHub UI, I prefer to work locally and then push changes. So, let’s fork the k-9 repo into your own account and then swap out ahoog42 for your GitHub username:
$ mkdir -p ~/spfexpert; cd ~/spfexpert
$ git clone git@github.com:ahoog42/k-9.git
$ cd k-9
Enable GitHub Dependency Graph
By default, a forked repo will not automatically enable GitHub’s Dependency Graph which is needed for the Dependency Submission API (and so you can see the dependencies!). To enable it, you’ll simply navigate to:
GitHub repo -> Insights -> Dependency Graph
and then click the green “Enable the dependency graph” button.
Build app locally (optional)
K-9 maintains a # How to build K-9 Mail article which is always worth taking a look at. The highlights are:
- Targets Java 8 but for command line builds, use Java 11
- Android SDK Build-tools 30.0.3
- SDK Platform 30
For this example, we’re just going to build the debug version of the app so we don’t have to mess around with signing keys. If you wanted to test it out on your computer, make sure you have Java 11 installed and then:
$ ./gradlew assembleDebug
which should build the app and store it at:
ls -lh app/k9mail/build/outputs/apk/debug/
total 27424
-rw-r--r--  1 hiro  staff    13M Nov  7 08:31 k9mail-debug.apk
-rw-r--r--  1 hiro  staff   385B Nov  7 08:31 output-metadata.json
2. Configure NowSecure: Mobile SBOM Action
Now we’ll create a new GitHub action that will build the debug version of the app and run the NowSecure: Mobile SBOM GitHub Action to generate an SBOM via binary analysis and submit it to the repo’s Dependency Graph via the beta Dependency Submission API.
Obtain NowSecure token and group_id
Once you have access to NowSecure (see free trial link above), you’ll need to generate an API JWT token and then determine your app’s group id.
NowSecure JWT Token
First, you’ll log in to NowSecure Platform and then (step-by-step documented in “Creating an API Bearer Token in Platform”):
User Profile (upper right) -> Tokens -> Add token name -> Generate -> Copy token
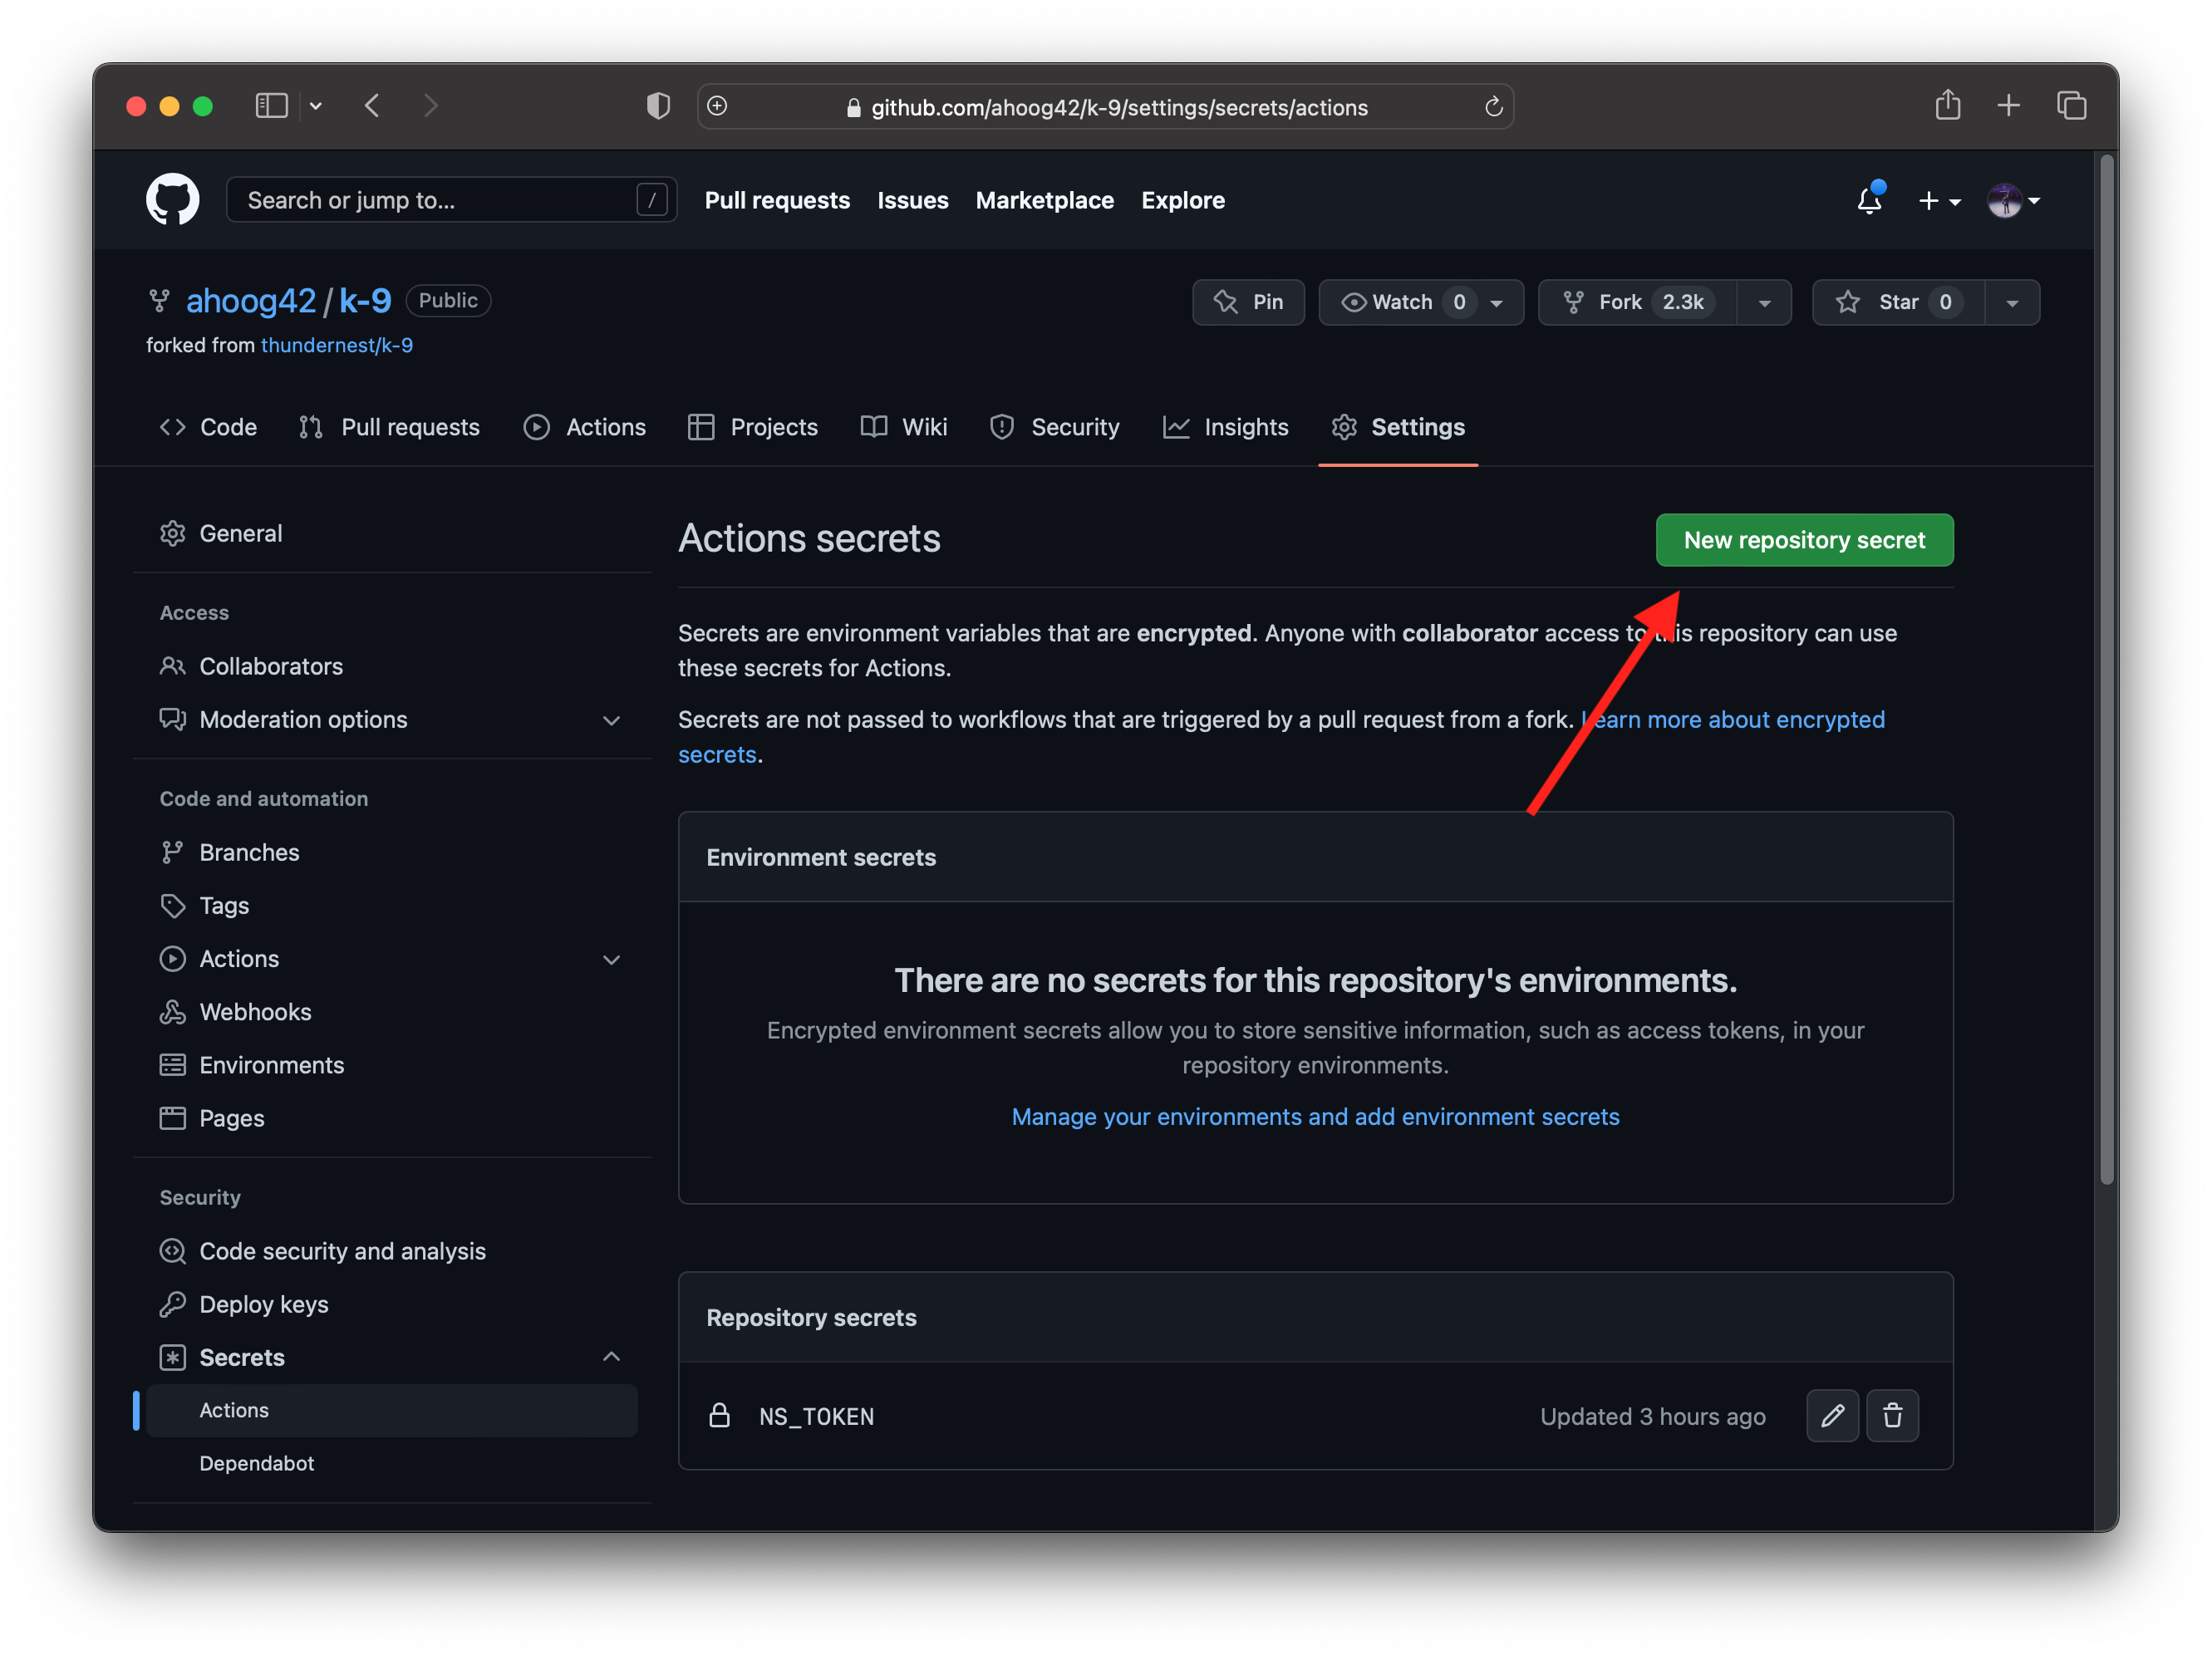
From there, you’ll add the token as a secret in the forked K-9 repo:
 Settings -> Secrets -> Actions -> New Repository Secret
And then put NS_TOKEN in as the name and the paste in the copied token from above. You can now securely access your NowSecure Platform token in your GitHub Action workflows.
NowSecure app group id
Similarly, let’s find out our default app group id in NowSecure Platform (see also “Where can I find the GroupID for the API?”):
Apps -> Select App -> Package Details
and they click the copy icon next to the app group (e.g. Auto Group). Go ahead and stash the copied UUID somewhere so you can paste it into the workflow yml below.
Configure workflow
To configure the NowSecure Mobile SBOM GitHub Action, you create a .yml file under .github\workflows. GitHub has great documentation on the workflow syntax. We generally create a file called .github\workflows\nowsecure-sbom.yml. Key configuration includes:
name- what to call the actionon- when to do it (workflow_dispatchis really handy for testing)jobs- these are the specific steps your workflow needs, often:- build the app
- upload to NowSecure and kick off an assessment
- process NowSecure Platform results
- upload SBOM to Dependency Graph
$ vim .github/workflows/nowsecure-sbom.yml
$ git add .github/workflows/nowsecure-sbom.yml
$ git commit .github/workflows/nowsecure-sbom.yml -m 'add NowSecure Mobile SBOM Action'
$ git push
Below is a nowsecure-sbom.yml file for building the K-9 Mail which you could easily adapt for your build process. For the group_id at the end of the yml, make sure you copy the group uuid from the previous step.
name: "NowSecure SBOM"

on:
  workflow_dispatch:
    branches: [ main ]
  # can add push and pull_request here

jobs:
  build:
    runs-on: ubuntu-latest
    steps:
      - name: Checkout repository
        uses: actions/checkout@v2

      - name: Install Java
        uses: actions/setup-java@v2
        with:
          java-version: "11"
          distribution: "adopt"
          cache: "gradle"

      - name: Validate Gradle wrapper
        uses: gradle/wrapper-validation-action@v1

      - name: Build application
        run: ./gradlew assembleDebug --stacktrace --no-daemon

      - name: Upload application
        uses: actions/upload-artifact@v2
        with:
          name: app
          path: ./app/k9mail/build/outputs/apk/debug/k9mail-debug.apk
          retention-days: 3

  scan:
    runs-on: ubuntu-latest
    needs: build
    steps:
      - name: Checkout repository
        uses: actions/checkout@v2

      - name: Download application
        uses: actions/download-artifact@v2
        with:
          name: app

      - name: NowSecure-SBOM
        uses: nowsecure/nowsecure-sbom-action@v1
        timeout-minutes: 60
        with:
          token: ${{ secrets.NS_TOKEN }}
          app_file: k9mail-debug.apk
          group_id: "xxxxxxxx-xxxx-xxxx-xxxx-xxxx"
Run NowSecure Mobile SBOM
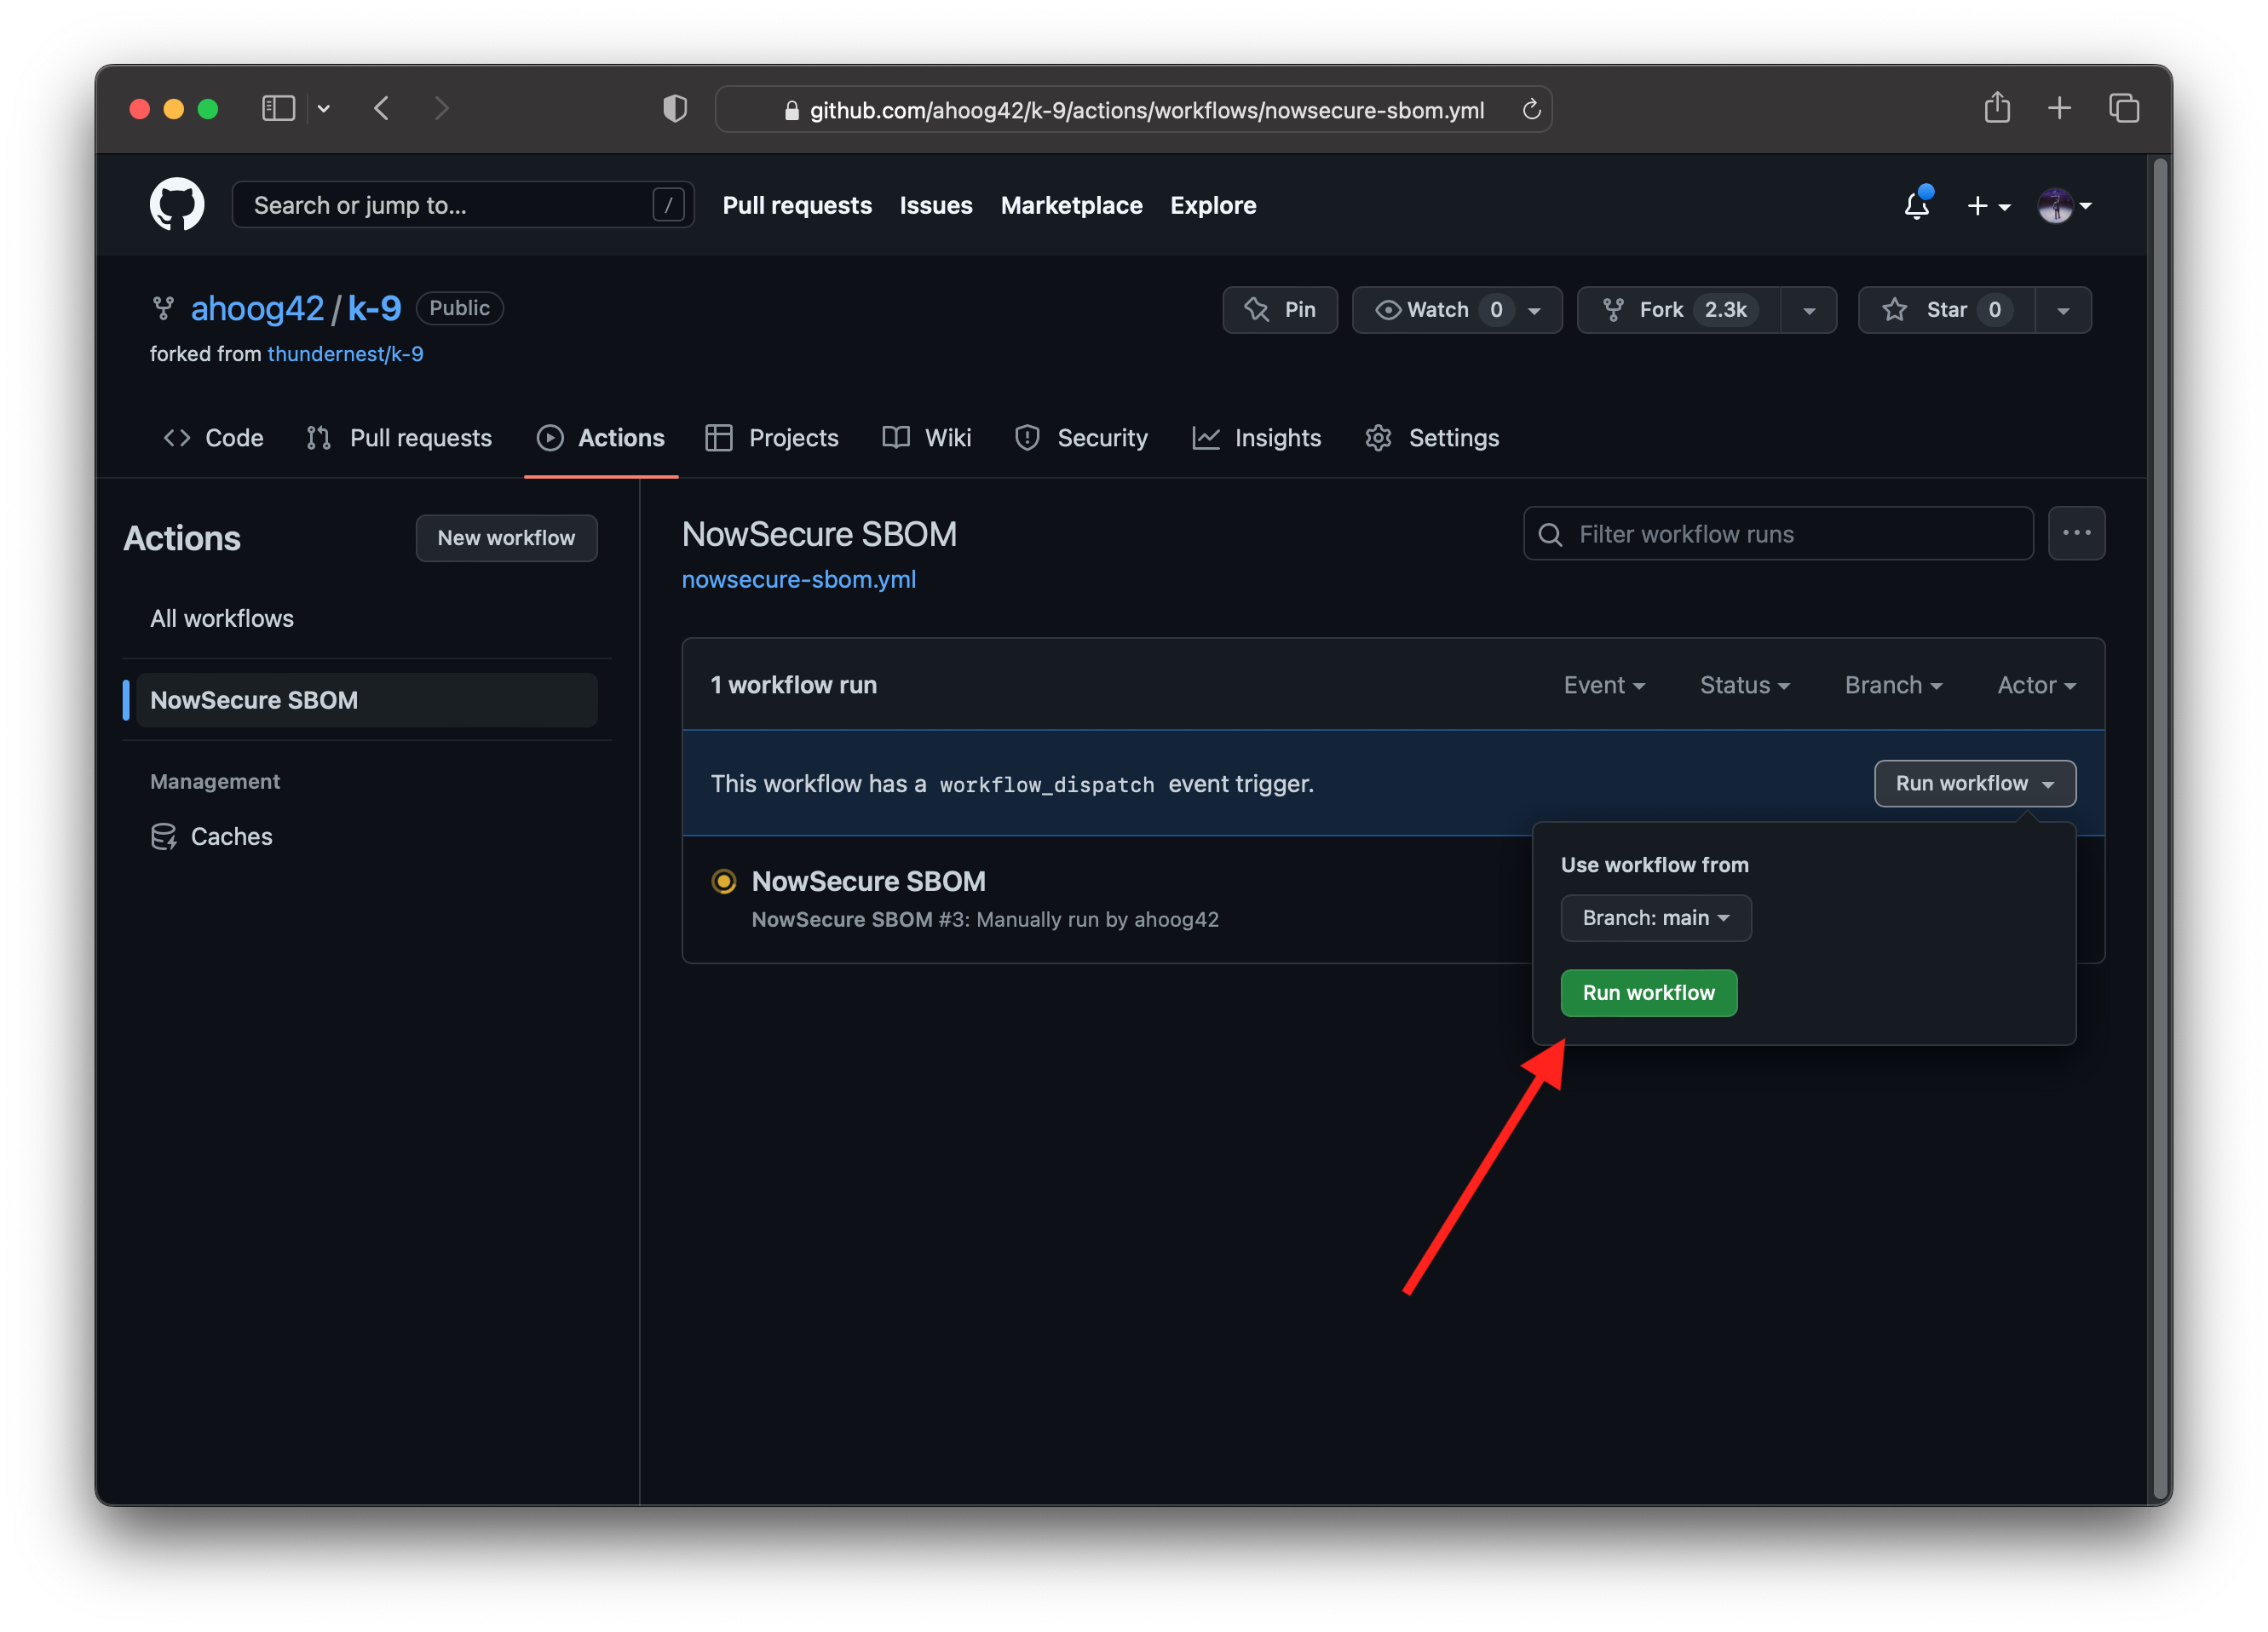
Now that we have the GitHub Action workflow configured, we can simply head to the GitHub rep UI and do the following:
Actions -> NowSecure SBOM -> Run Workflow Dropdown -> Run Workflow

The workflow will then kick off the build process, then upload the binary to NowSecure Platform for analysis and lastly will pull the SBOM results back into the Dependency Graph (this can take 15-30 mins since we also perform dynamic analysis on the mobile app binary).
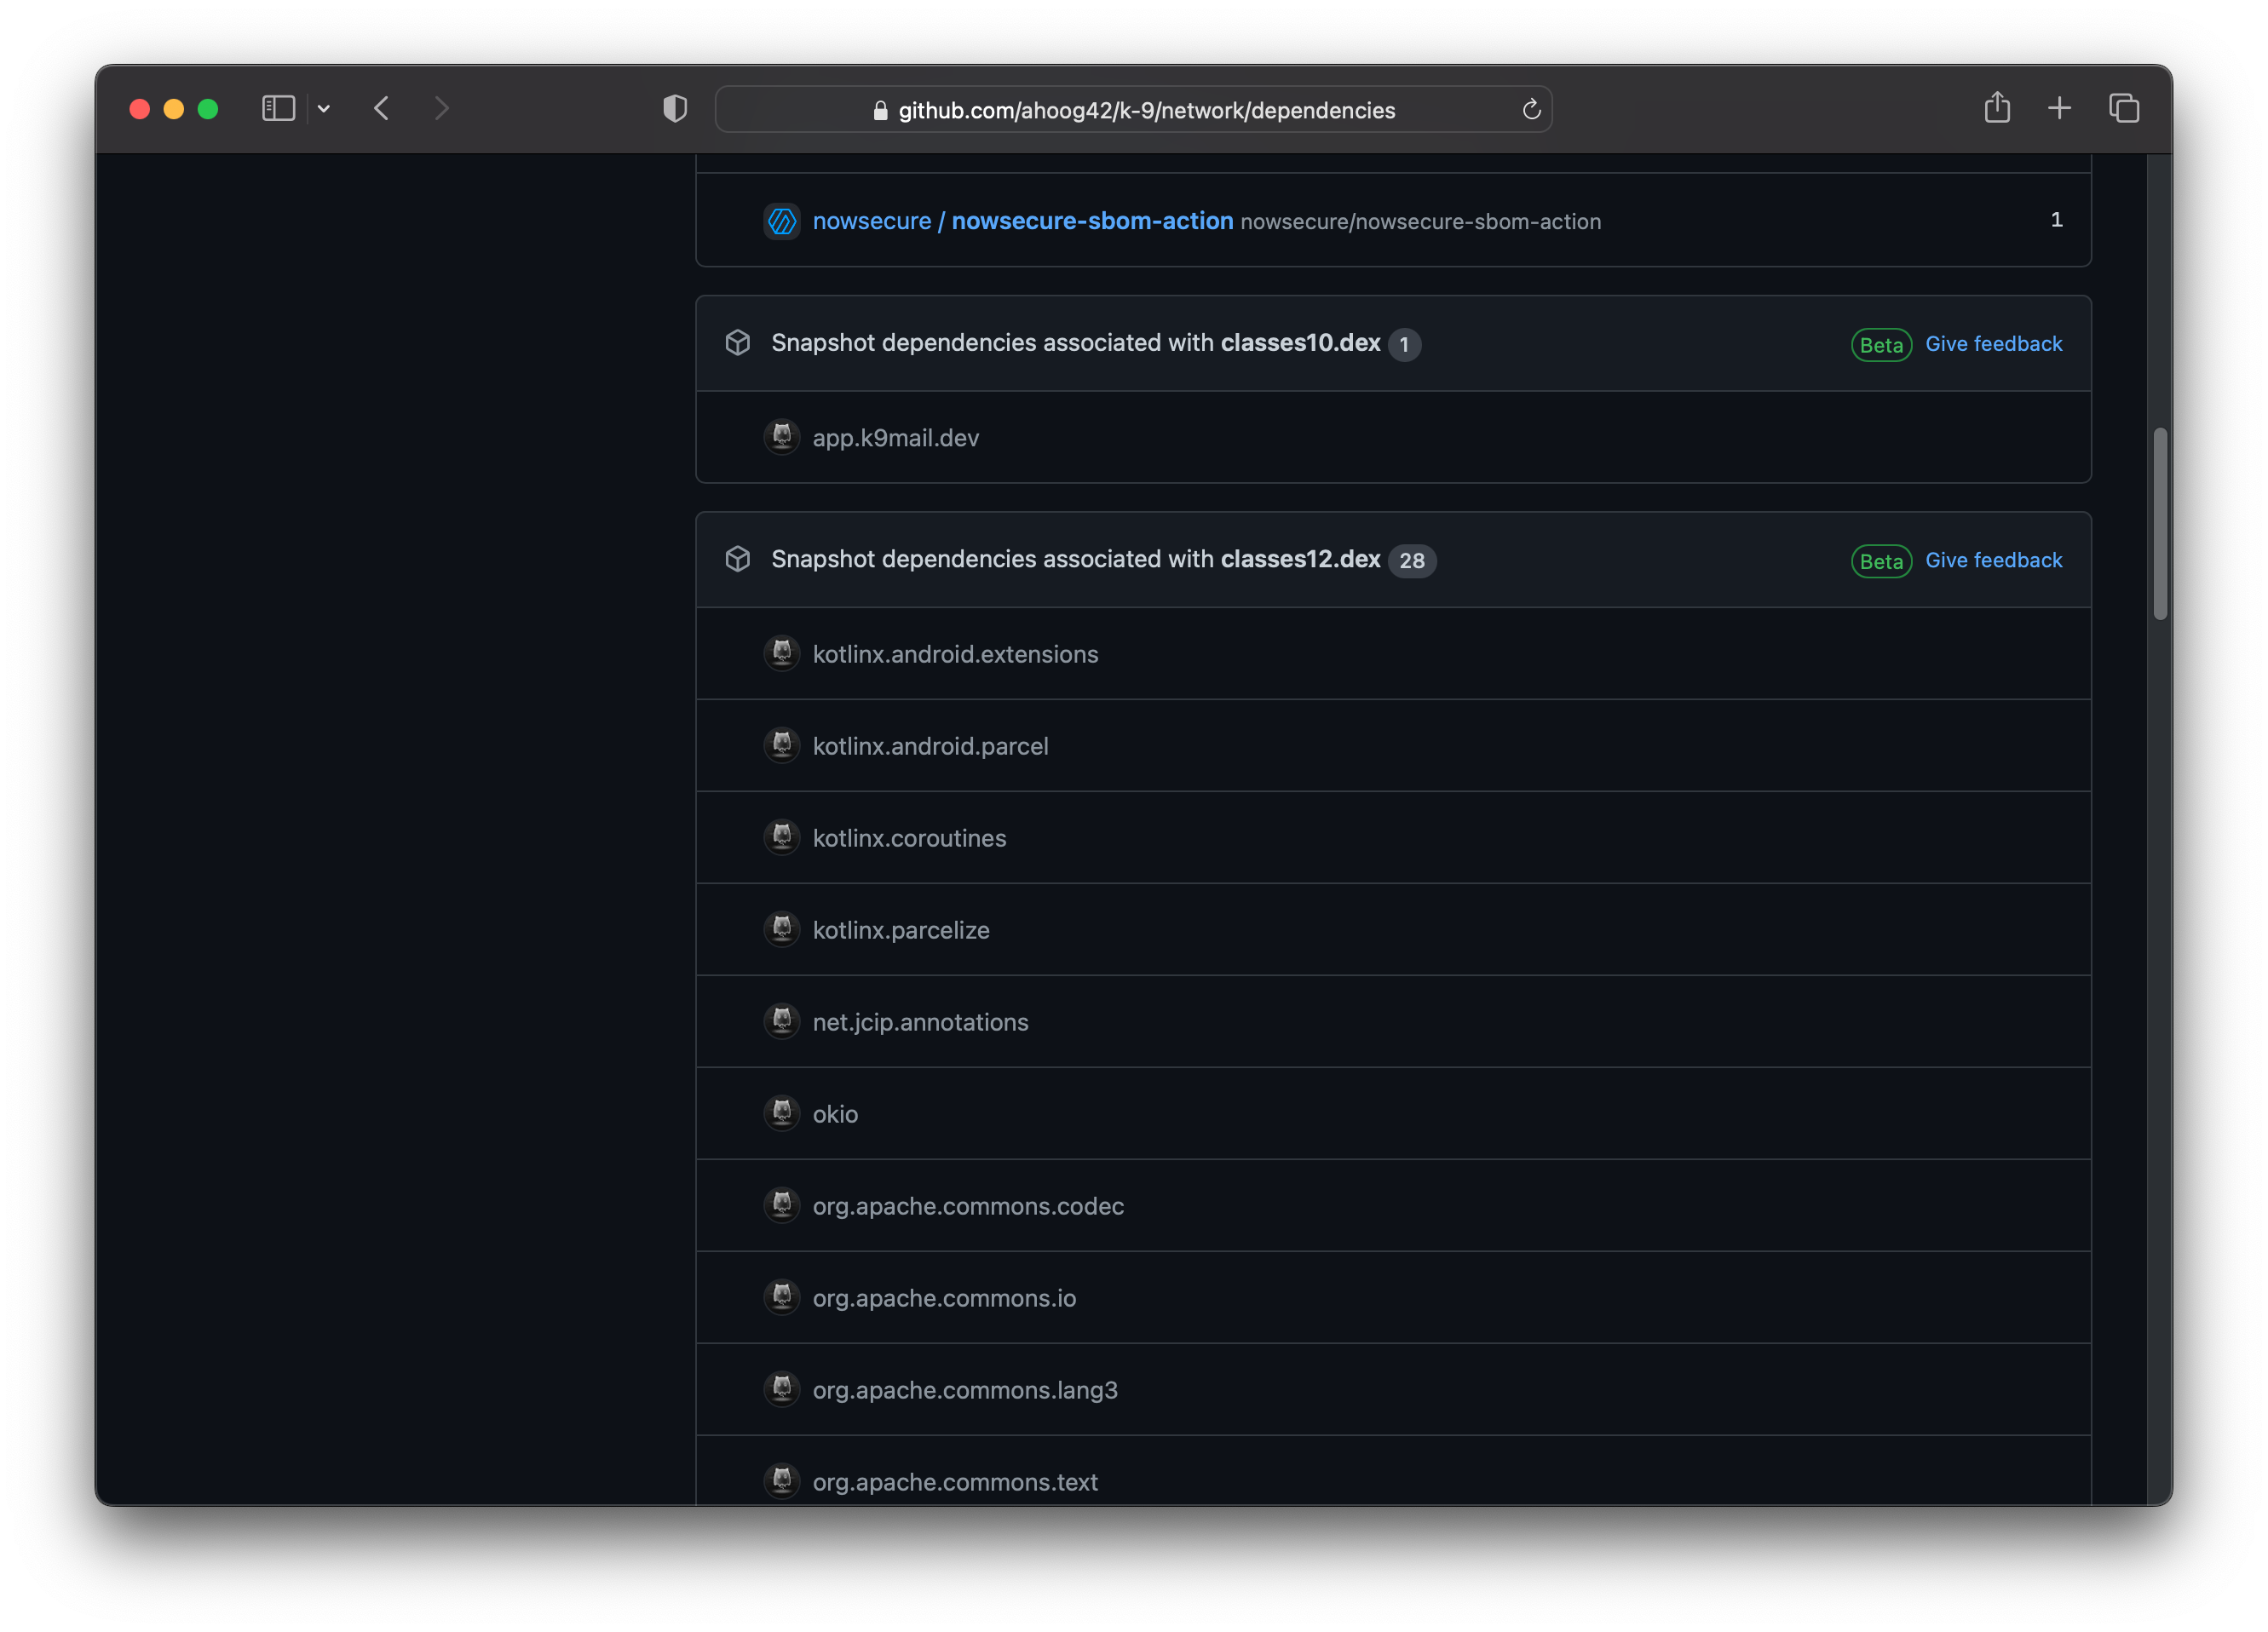
After the workflow completes, you can view the full list of dependencies in your repo’s dependency graph:
GitHub repo -> Insights -> Dependency Graph
 Since we’re using binary analysis, the results will be grouped by the source in which the dependency was found. In this screenshot, you can see there are multiple dex files and we can see dependencies from core Android (kotlin), okio from Square, Apache and more.